Sunday, July 7, 2013

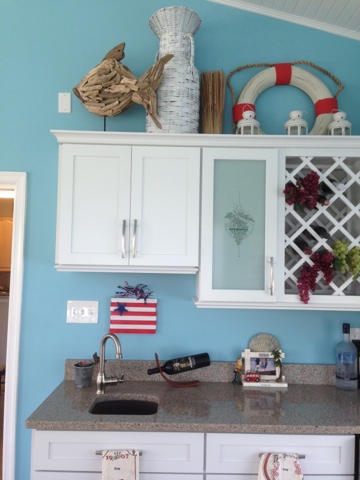
Beach American Flag Decor

My Dad is always fostering creativity in Kyle, as he did to me as a child and look how I ended up! So he brought a bucket of scrap wood for Kyle to play with and build things.


My son has a very good imagination and as soon as he started playing with them, he wanted to make an airplane. So paint and Batman duct tape transformed this plain wood to the Batplane! (And made Mommy a superhero!)

So the challenge was on! What could I create?? Lately, I have been so inspired by the 4th of July projects on Pinterest. I saw one similar to my version on Pinterest but I can't find it now:( Sorry I like to give credit for the inspiration but it is lost in Pinterest land.

I knew I had all the supplies on hand already so I had to get started! 

Supplies: Wood scraps, spray paint, shell, screws, wire hanger and ribbon. 


I did add some Flag ribbons that I scored at Michael's for 75% off. I think this goes perfectly in our beach themed sunroom. What do you think? 


You simply can't go wrong with American decor. Hope you all enjoyed the holiday and weekend! 
~Jenn

Linked up to these Blog parties...


Thursday, July 4, 2013

Free To Be

Happy 4th of July!!

A few years ago I was involved in a circle journal and it is one of my treasured projects. 
If you are new to this idea, it's where you are in a group of others, each makes a journal and it goes around the list which also means it may go around the world, for people to add their entries to your book as you add to theirs. This one went out of the country a few times. 
 I picked the theme Free to Be. 


In making the cover I printed a copy of the Declaration of Independence off the internet onto velum. I then soaked it in light coffee water, wrapped in around the inside and added my own touches.


This was my inside layout and others added to the following pages. It was interesting to see what others thought freedom meant.


Inside I printed the following journaling:


Freedom means so many things to each of us differently. Not having any immediate family that serves in the armed services does not exclude me from feeling indebted to those that have, are, and will serve to keep us in a country of freedom. 

Enjoy your 4th and your freedom.
~Cathy

button

Monday, July 1, 2013

Monster Truck Birthday Party Part 4 - DIY Monster Truck Race Track


For the whole Monster Truck experience, please review Parts 1-3 for ideas. This was my favorite part because it is an original idea. I was brainstorming with my scrap ladies one Friday night on what materials I could use to create the track but keep it safe for kids. I am a HUGE fan of the dollar stores and knew I wanted to use the pool noodles in some way. My girlfriend Laura came up with the brilliant idea to use yard sticks. Here is how we did it.

1. Use landscape chalk to mark out your track.
2. Measure your checkered flags and hammer in yardsticks with a rubber mallot. We hammered them in approximately 6 inches deep and just eyeballed the distance between the noodles.
3. Cut slits with a box cutter along the side of the noodle so you can slide it around the yardstick.
4. Attach your race flags from noodle to noodle and complete the track. I cut out the words Finish for the final flags at the end.

Another, prop that was a HUGE hit with the kids was the case (36) of Tire Swim tubes that I bought at the Dollar Tree. We blew them up and stacked them. The kids had a blast stacking and knocking them down. 


The greatest part was....the guests were able to take their Grave Digger trucks, tire tubes and noodles home after the party. Who needs 20 pool noodles and 36 tubes???

You don't even have to wait for a birthday. This is fun to do as a summer activity. 

Special thanks to my parents and brother who helped execute on the crazy Monster Truck track. You know you love me and my crazy ideas!!!!


Let's start planning next year.......
~Jenn

Linked up to these blog parties:

BWS tips buttonSumo's Sweet Stuff
Skip To My Lou


Thursday, June 27, 2013

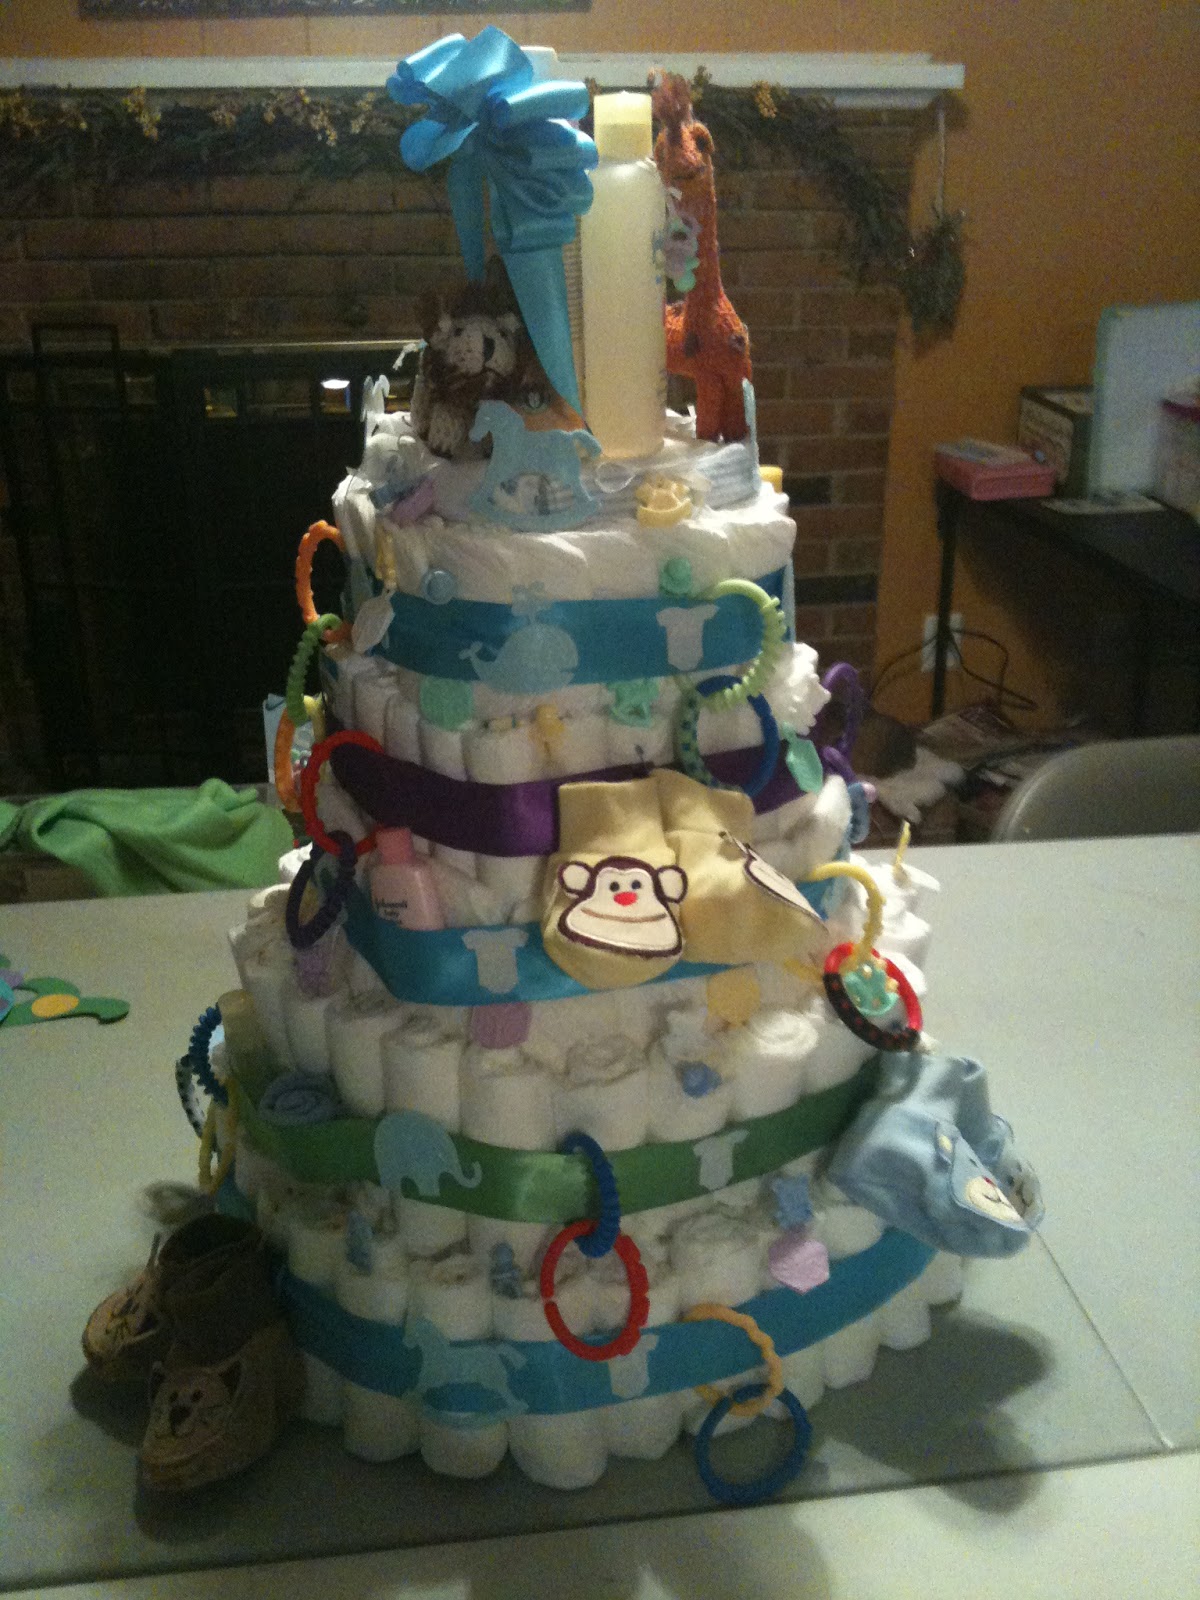
Baby Shower Diaper Cake and Diaper Wreath


For my daughter's baby shower, for her first baby boy, I made this diaper cake (among many other projects!) and it was so much fun just adding and adding to the cake.
 All around the edges (aside from the boxes of diapers) I added toys, booties,
 travel size baby lotions, and so many other little useful items. On top
 of the cake I added the full size bottles of Bert's Bee baby goodies.


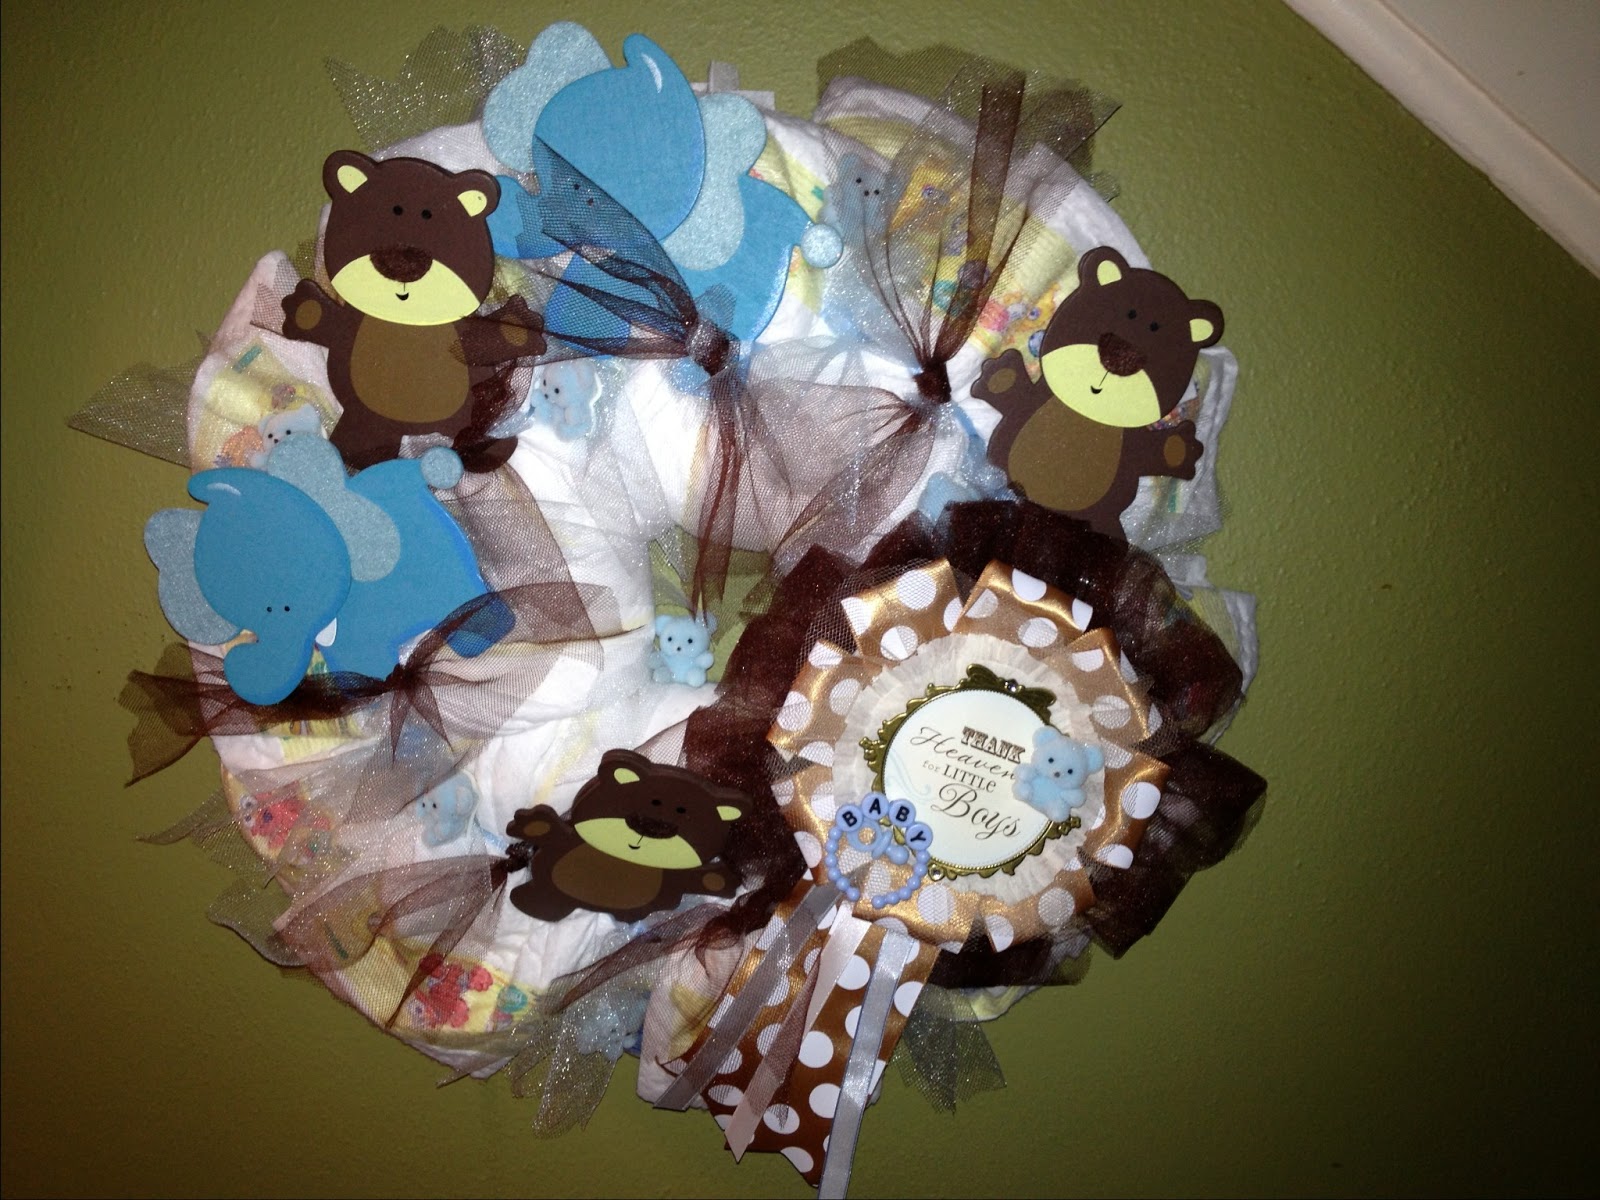
Now for her second baby shower, which I have learned is called a Sprinkle, I  made this diaper  wreath. Theses projects are so easy and so much fun to just build and build. The difficult task for me is to know when to stop adding the goodies. There is just no rules for that!


I also made these other little treats such as the baby stroller lollipops, covered Hersey bars with my own ingredients list, and even little onesies covered boxes with treats. 


Just remember to have fun in whatever you are creating.

~Cathy

Linked up to these blog parties:

Somewhat Simple button

Wednesday, June 26, 2013

50 Creative Ways to Entertain Your Youngster

I read somewhere that kids need to feel a sense of purpose and that they add value even at a young age. So, I am always trying to figure out little jobs for Kyle. How can I have him help me and feel a sense of responsibility? It takes effort to think this way and you have to relinquish control that things might not be exactly how you would do them but that is OK!!!! REALLY! 

"Kids spell love t-i-m-e." {John Crudele}

As I started writing down these items, the list grew to other creative ways to entertain your little one. What I ended up with is a list that I use to keep my child engaged, give him a sense of family and responsibility. OK and sometimes just enjoy being a kid. You only live once!
  1. Have them help clean windows with Windex and paper towels.
  2. Paint the walls of the tub mixing shaving cream and food coloring together in a muffin pan. When they are done, rinse off the walls with the shower sprayer -- cleaning done!
  3. Give them a pack of Post it's. It's amazing what they will do with the sticky paper! The best part? They can stick it on windows and walls -- no problem!
  4. Read books every night. No excuses!
  5. Draw on peelable fruit for lunches - such a cute surprise that brings a smile. Faces on bananas and oranges
  6. Let them play in the sink and wash dishes. 
  7. Banner coloring - The easels just don't seem big enough. Roll out that paper on the floor and give them a huge canvas. 
  8. Unpack groceries - I have Kyle help put away the snacks in his special place and stack the juices in the fridge. This keeps him busy and helps me out!
  9. Go on family bike rides
  10. Feed the birds - We have bird feeders that it is Kyle's job to fill. He loves feeding the birdies and it makes him more aware of wildlife right in our backyard. Let's face it, if he misses the feeder the birds will find it!
  11. Plant and water a garden. Then pick and eat the fruits of your labor together.
  12. Help with laundry - Put dirty clothes in the hamper, pour the soap in the washer, push the buttons, match socks, put their clothes away. 
  13. Make cards and mail them to grandparents.
  14. Paint outside with water - Paint brush, water and sidewalk = done
  15. Build something out of scrap wood (Papa gave us a whole bucket!)
  16. Use a water table but fill it with bubbles or sand.
  17. Paint rocks.
  18. Make a treasure map out of an old place mat.
  19. Give them a Lysol wipe and tell them to wash their car or bike. This on continues to deliver every time we are out in the garage.
  20. Give them the floor dust Swiffer and have them sweep the floor.
  21. Make a paper airplane.
  22. Go fishing.
  23. Play hide and seek.
  24. Have family movie night with popcorn made the old fashioned way. 
  25. Take a hike and collect treasures along the way (bring a bucket).
  26. Play in the rain and jump in puddles.
  27. Hammer preset nails in a 2x4 - supervision required and mini hammer suggested.
  28. Stock up on crafts at $1 store for a rainy day.
  29. Make a stepping stone for the garden. You can find kits at Michael's craft stores.
  30. Help put mini flags out in the yard for US holidays (Memorial Day, 4th of July, Labor Day). Instills American pride!
  31. Give gifts for no reason to their friends. Regifting something that they really don't need, teaches them the art of giving. 
  32. Catch lightening bugs in a jar for a nightlight.
  33. Put repositionable wall stickers in their playroom or bedroom
  34. Make a special corner or place in the house for only them. We turned the playroom closet into the batcave!
  35. Make old fashioned Kool-aid pops and make them wait:)
  36. Give the sticker sheets and let them put stickers on you. My hubby is a good one for that!
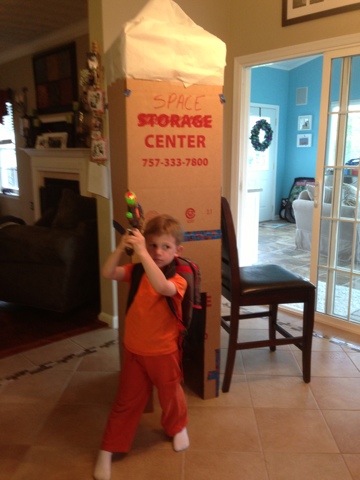
  37. Make things out of boxes and duct tape. Kids have the greatest imaginations and if you need inspiration, search Pinterest. The possibilities are endless!   
  38. For the little girls, let them do mommy's hair then daddy's!
  39. Let them help u cook or bake. 
  40. Make racetracks out of yard sticks - only 75 cents at Home Depot!
  41. Spray weeds with this amazing organic weed killer found on Pinterest! HERE
  42. Have grandparents mail cards to your kids an unexpected sticker sheet or card in the mail works wonders and teaches them to appreciate old fashioned communication.
  43. Give them options and let them make choices.
  44. Together put glow stars on their ceiling.
  45. Pick a day or weekend when they can wear whatever they want. Let it go!
  46. Make a pillow pool and let them jump in it. 
  47. Play in the sprinkler.
  48. Make mud pies.
  49. Eat dessert before dinner.
  50. Have them set and clear the table.
  51. Always kiss/hug them goodbye and hello. Always.
How many on the list have you done? What are some other ideas you have? These aren't rocket science but we all need reminders to slow down and remember what is important. 

T-I-M-E

Relinquish control and have fun!
~Jenn

Linked up to these blogs today! 
Lil\'Luna

Life With The Crust Cut Off

Tuesday, June 25, 2013

Recycled Acrylic Frame Album

Okay if you have been following our blog, you are somewhat aware we are big on finding new life for old items. Also we are thrift store junkies.
 With that said, finding so many of these little acrylic frames for just pennies, seemed destined to be turned into something, an album of course.


This can be done with single frames or double frames. It's great to make calendars or albums,
just so many options for these free standing little treasures.


The number of pages are your choice, I just used the key rings at the top with holes punched in the card stock and let my imagination run.


I added little pockets, frames, library cards. It's just the perfect project that will become addictive and so good for using your little odds and ends. 
Of course I am always a fan of any many embellishments. 
The more the merrier. Have fun.

~Cathy

Linked up to these blogs.

Today's Creative BlogCrafty Confessions