Wednesday, May 29, 2013

Paper Bag Baby Boy Album & Diaper Bag


So with 3 grandsons I love making baby albums and layouts. But sometimes I do get carried away. So with this paper bag album I wanted to step it up a little and find someway of making it more of a gift than just the album. This project just sort of took on a life of its own. I do get a lot of my inspirations from Splitcoast Stampers and then just run with any idea.


So first I found these wonderful little blue paper bags and knew right away—paper bag baby boy album. So I started adding and adding until I finally considered it full to place all the little memories of pictures and journaling. This was a great way to use so many one of kind little embellishments.


Next using a 12x12 sheet of paper I formed the little box open ended and added the handle and then two little slots on the sides for little bottles. Of course this is so easy to change up; you could add baby rattles, booties, little frames, or anything that comes to mind. I also added the little pocket on the front with Love where a gift card can be slid in.


So even if you didn’t want to make the album, you could always just fill the little diaper bag with goodies as a unique baby shower gift.

Just let your imagination run. That is what makes it fun! 

~ Cathy

Tuesday, May 28, 2013

Typewriter Board

Can't imagine how life existed before Pinterest..... In the "old" days I would blog hop and find ideas and save them to my favorites. I first saw this in Potterybarn and it was of course pricey!!! Those of you who know me know I LOVE PB but can't always afford their prices. Then I saw these 2 blog posts .... {here} and {here}.

They both provide great step by step directions and two different results, so I knew I could tackle this!

What you need:

  • 24x24 plywood
  • Stain of your color choice
  • Sandpaper
  • Printed Typewriter keys - You can download these from {here}
  • Nails - whatever type of nail you want to use. I used small black carpet nails for an antique look.
  • Mod Podge
  • Metal corners - I used Tim Holz sold at Michael's Craft Store. Don't forget your coupon! 


Using the 24x24 plywood board that I purchased at Home Depot, I measured out and marked 4 inches so I had 6 - 4" blocks in each direction = 36 letters and numbers for the board. My dad used his table saw to cut on the 4" marks a 1/4" deep cut.

I stained it to the color I wanted, then Mod Podged the cut out letters to the board. Then I hammered in the nails in the four corners of each letter except for the exterior corners where the metal corner is attached. I had to pace myself with that because my fingers were raw! 


I used 3M picture hangers to hang it on the wall and voila! I am loving it! 

What PB knock-offs have you tried?
~Jenn

Saturday, May 25, 2013

Serving it up!

My brother and I were very blessed to have the opportunity to travel overseas as children with our family. My favorite memories are when we travelled to Europe with both our Grandmothers and parents. We climbed many steep windy roads to castles and dined in many pubs. Of course we didn't have a drop of beer; however, we collected many many coasters from all over Europe.

About a year ago I remembered that my parents had this bag of coasters and asked them if I could have them. Not wanting to part with the memories, they asked me what I was going to do with them. I didn't know but I knew I was going to make something for my brother.

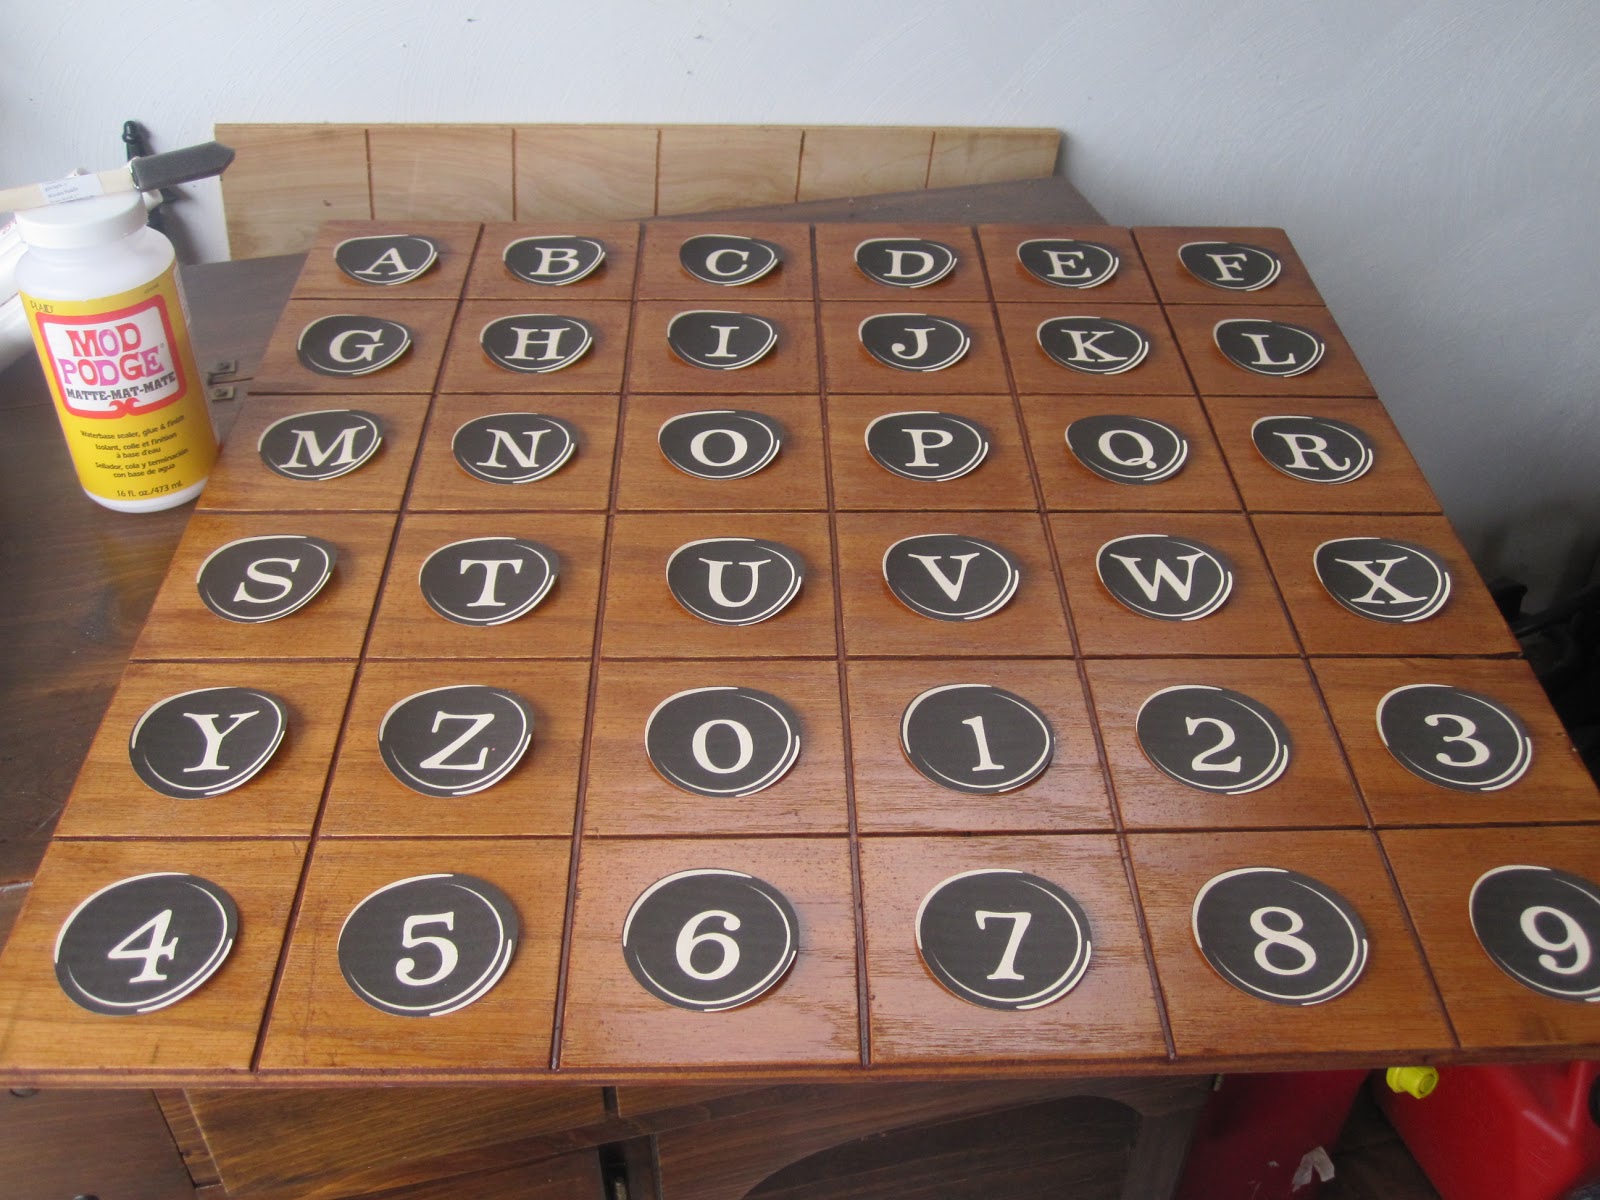
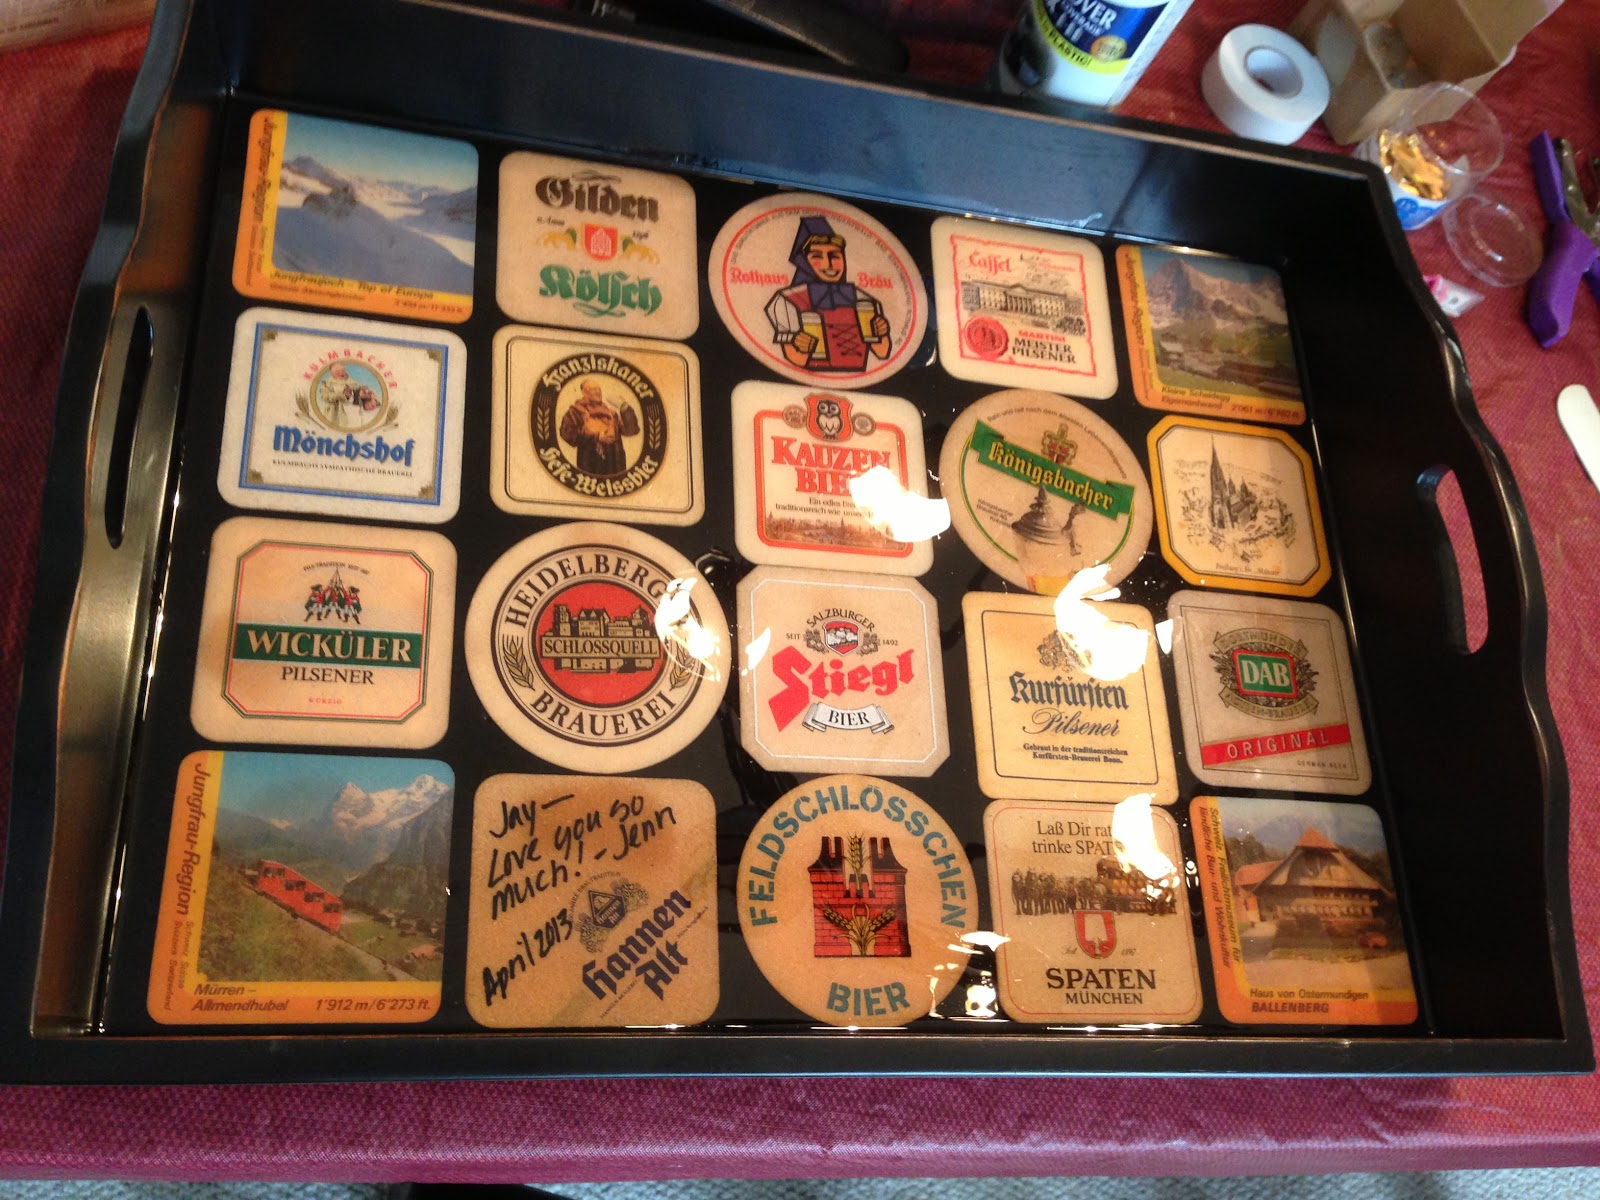
Then it came to me....a serving tray. So I picked the coolest coasters and started arranging them in a wooden tray I purchased from Hobby Lobby. Of course I used a 40% off coupon! It is like a puzzle so make sure you are happy with the layout before you start adhering. Planning is key.

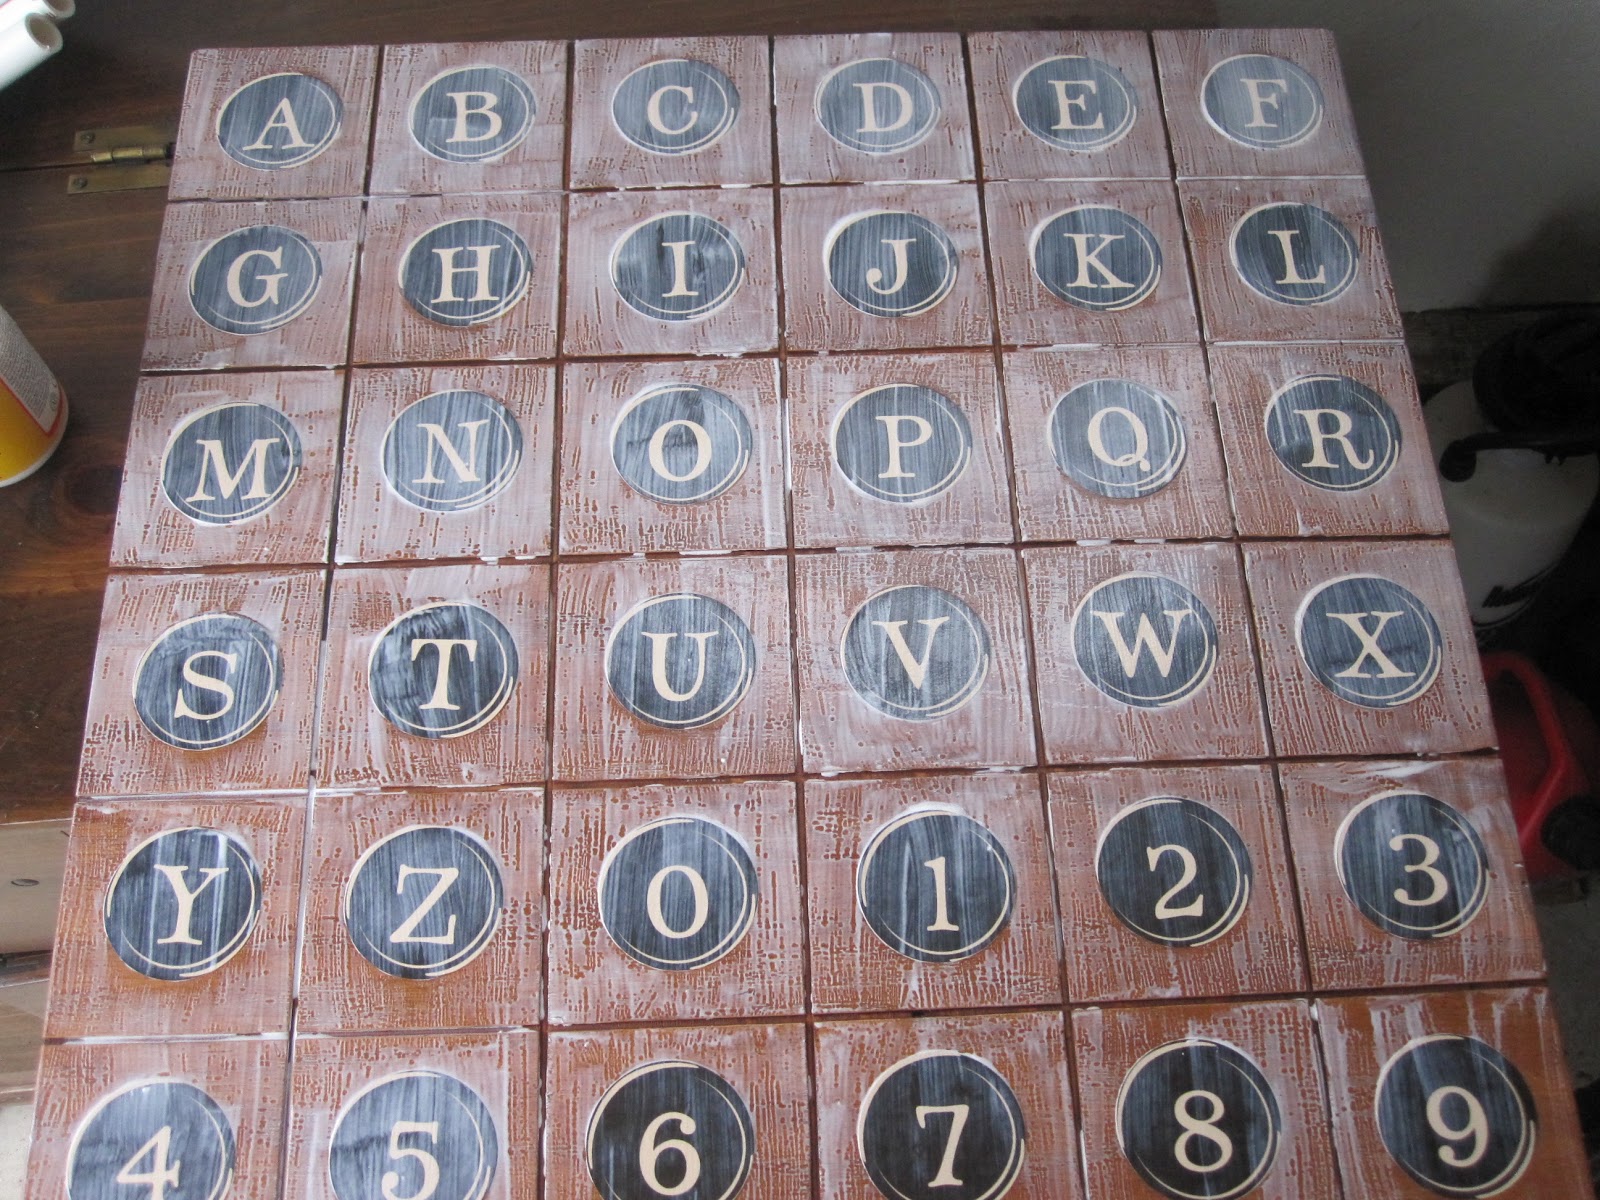
I used Modge Podge to paint lightly on the bottom of each coaster just to secure them to the tray. After, I placed books on the tray to ensure that the coasters adhered to the tray.

After about 24 hours, I decided to start reading the directions on the epoxy I bought. [And yes, you MUST read the directions] It was about $20 and my Dad and hubby picked it up for me at Home Depot.  I got two trays out of one box.

I followed the directions on the box exactly. My only amendments to the directions are:
1) Be prepared to be able to monitor the project for 3 to 4 hours. Bubbles will surface and pop. The epoxy will start setting and once it starts setting you need to blow the bubbles so they pop. Bubbles will cause craters in the final product so it is important that you continue to check back and pop the bubbles. I think I had more because of the nature of the product I had in the resin. Coasters are porous and have air bubbles. That is my theory.
2) Use a hair band to secure your hair back. This is KEY. I was so over blowing out the bubbles that I got sloppy and didn't hold my hair back once. That was all it took as I looked down to 1/2" of my hair immersed in epoxy. UGH! I totally thought I was going to have to head for a haircut but I did get it out and the project was fixable. Thank goodness!


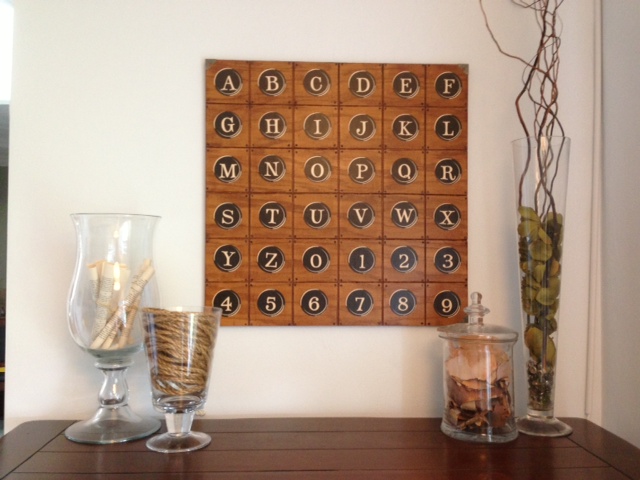
Pretty pleased with the finished product and my brother looked pleased as well when he received his belated birthday gift on a recent visit! We all had a nice trip down memory lane looking at the different coasters and reminiscing on our European vacations.

Display your memories - don't hide them away!

~ Jenn

Friday, May 24, 2013

Superhero Storage

Every time I finish any kind of container whether it is a glass jar or plastic box strawberries come in, I have a serious problem throwing them away. I think, "How can I use this?" Sometimes I part with them and sometimes I save them in the garage until I have a plan. Since the garage is my husband's domain, I select my junk treasures carefully. So after months of saving my Foldgers containers, I realized I had to come up with a plan.

Immediately, I knew I had to spray paint them. They would be great for corralling all my son's junk - I mean toys! So I chose a color that went with his superhero playroom. I swear by Rust-oleum - it is the best! I used Gloss - Brilliant Blue, perfect superhero color!
 

As I was waiting for the spray paint to dry, I started looking around for a superhero logo to put on the front. I searched my computer and then I remembered these coasters I bought in a Michael's $1 bin a while back. But I couldn't attach a coaster to the front. So I put them on my scanner and copied them in color to regular computer paper. I cut them out so they were the exact size of the beveled front of the Folders container.


Next I used Modge Podge to glue and seal the photo to the front of the container. I smoothed out the bubbles and let it dry.


I am so pleased with the results! They worked PERFECTLY on the shelves in my son's playroom. And they corralled all the puzzle pieces in each individual container.

Tell us how you recycle everyday items......
~Jenn

Monday, May 20, 2013

In Progress

Magical things are happening behind the curtain and we can't wait to share them!!!