Monday, August 19, 2013

Upcycle and Keeping The Memories


When my daughter was thirteen she decided for her birthday (aside from the teenage party) she wanted her bedroom redecorated in sunflowers. So with the comforter, curtains, pillows and all the little extras, as one of her gifts my mom bought her this little draw cabinet to hold all her CDs. 


I have had this cabinet up in her old bedroom for years and one day walking by it,
 I decided it needed a new home. 
Now that she is expecting her second son, she is working on his nursery.


 So I took all the drawers out sanded, painted and stained .
In doing this I found tucked behind one of the drawers was one of her little writings.. so sweet. 
I left this little memory.


Redoing this little cabinet was a surprise for her and now works well for all the 
new little booties and other little baby items. 
So what once held her little secrets and music now will hold her little baby's treasures.


This is why keeping and remaking the old into the new is sometimes so much better then going to the store and pulling something off the selves.



Thursday, August 15, 2013

Gift Closet Reorganization

To redo my gift closet has been on my list for quite some time but to be honest it looked like an avalanche! Very intimidating and unfortunately I'm not very good at taking "before" pictures. This is probably saving me a bit of embarrassment at this time so just imagine this closet with all my Christmas stuff from this past season thrown in there looking like an avalanche!

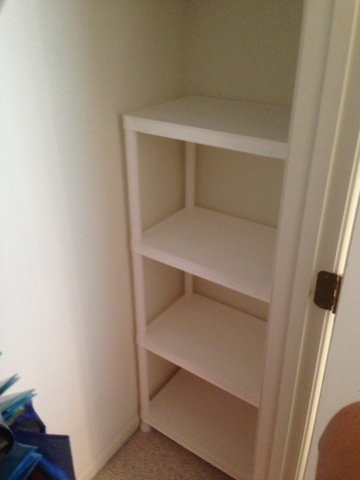
First, I was on a mission to find a shelving unit that would help me maximize the dead space in the back corners of the closet. I scored some sturdy plastic white shelves at Home Depot for $14.99. 


I bought 2 then 2 more for Kyle's closet which is next on my list! Look how perfectly they fit!


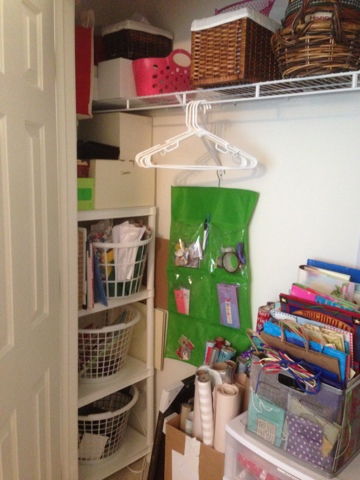
Here is my finished gift closet:
I used white laundry baskets from The Dollar Tree to optimize shelf space and make items visible and accessible. I spent $6 total for all the baskets! WOW
Since this is in my guest room, I wanted to have a place for guests to hang clothes. The shelves make this possible.



I like that I have everything here that I need to wrap a present. All the tags, tape, scissors and pens are in this green pocket organizer. Everything is organized and has a home that makes it easy for me to return items. That is essential in order to sustain organization ( and train your boys!)

Now tackle that avalanche!!! Next up... Kyle's closet!

Wednesday, August 14, 2013

HomeGoods Finds!

Okay so it's summer and I'm finally doing my spring cleaning! UGH

Things have been so hectic here and I function better when everything is organized! So lately, I've been organizing room by room. I will share some of my projects in posts later this week. 

When I reorganize, I usually try to recycle items that I already have or shop wisely. Recently, I was introduced to the store HomeGoods by my sister-in-law.... oh my goodness I am addicted!

Here are some of my recent scores:
Metal file folders - $19 - Been wanting to corral all my son's lovely artwork from school and the incoming mail that ends up on the counter! UGH
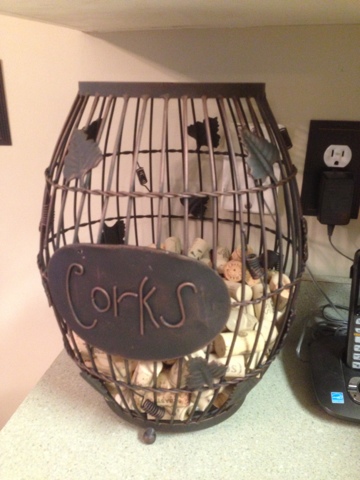
Cork Barrel Cage - $19 Need I say more?

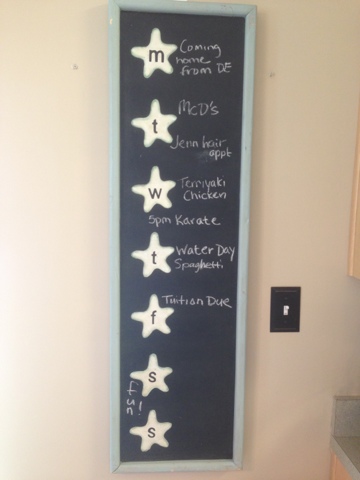
I was so excited to score this chalkboard that I had to hang it. So, please forgive the screw patching holes on the wall that need attention ;)

I have found that I shop wiser and save more money when I plan out meals for the week. So I saw this board ($30) and I thought this was a way to organize our whole family and it looks really cool! Double score!
Have you noticed that I'm slightly obsessed with turquoise? I've been trying to change my pop color to turquoise instead of maroon in my kitchen and den. I think I have Cathy to blame for this!!! Her use of turquoise in her living room has motivated me to go bolder;) She has such a knack for decorating.

What treasures have you found at HomeGoods?
~Jenn

Tuesday, July 30, 2013

Busy, Busy!

Between vacations, our day jobs and just the action packed activities that summer brings, we have been consumed!! We have managed to work on product for the website! 

Here is a sneak peak of what has been in progress....

Lots of other project inspiration for summer! Check back tomorrow!

Tuesday, July 16, 2013

Kitchen Ledges- Awkward or Opportunity?

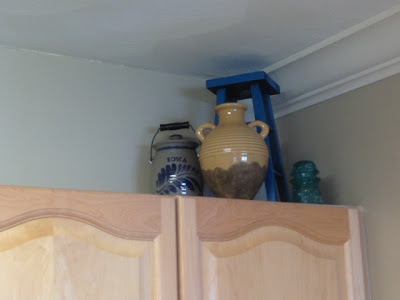
I have a love hate relationship with my kitchen ledges. I have never known how to decorate them and so I searched Pinterest with little to no luck. My goal was to use what I had on hand to create a visually appealing display. I did pick up a few pieces at the thrift store - cheater!

My parents are from Iowa and I love having the pottery around the house that reminds me of summers in Iowa. I had everything on hand here but the R. I think that was $5 at Tuesday Morning. 
I had all of these items on hand except for the wreath. I bought this for $1 at the thrift store. Though it wasn't perfect, you really can't tell from a distance.
The plate I picked up at the thrift store. I spray painted the Simple sign with Lagoon from Rust-o-leum. The lemons are actually a dishtowel that I purchased from Crate and Barrel for $5 and framed. Instant art! I didn't have pretty dishtowels on hand :(
The plate was another thrift store find. The apothecary jars with the tomatoes and limes in them are $1 store purchases glued together to make the jars. They are candlesticks and vases = $4 for 2 sets SCORE! 

The stool I spray painted lagoon so I had some consistency throughout the stories. Same idea with using the glass insulators in turquoise throughout the groupings to connect them. 


I have to admit that I had a hard time having open space but I love how it turned out! What ideas do you have?

~Jenn
Linked up to this party:

Thursday, July 11, 2013

Little Garden Shed Makeover

When we first bought our home 12 years ago, this little shed was sitting out back. We've always used it to store garden supplies and it did the job. One day recently, I looked at it and thought it needed a new look.

So I started out with painting the trim a soft Caribbean blue and found great pieces of metal wall hangings that would weather well.
I also painted the front door a nice bright red and even the cheap piece of plastic fence got a facelift to match the trim.
What was a dingy shed is now a bright welcoming spot in my backyard! I have to say I LOVE the view now!
~Cathy

Tuesday, July 9, 2013

If you like Pina Colada's.....

And getting caught in the rain! Just getting into a Jimmy Buffett frame of mind for the concert on Saturday! Whooo! It made me remember this awesome Pina Colada Pound Cake recipe that I haven't made in a while.

For the most part I don't eat sweets - I just feed them to my hubby. Until....my hairdresser, Kristen gave me this recipe verbally and I just had to try it. The best part is that it is super simple and you can add alcohol! I am thinking Malibu Rum......

Ingredients:
1 pound cake mix
1 cup shredded coconut
1 cup drained crushed pineapple
2 mashed bananas
1 cup chocolate chips
1 tsp vanilla extract

Mix everything together and bake. I love how all the chips fall to the bottom for a chocolately base. Those that don't like shredded coconut will not even notice the texture. I really want to try making a glaze with confectioners sugar and Malibu or Parrot Bay Rum. Yummmm...

Thank you Kristen - this has been a hit. I will be making lots of these in the future.....Enjoy!
~Jenn

Sunday, July 7, 2013

Beach American Flag Decor

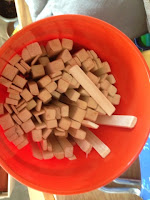
My Dad is always fostering creativity in Kyle, as he did to me as a child and look how I ended up! So he brought a bucket of scrap wood for Kyle to play with and build things.


My son has a very good imagination and as soon as he started playing with them, he wanted to make an airplane. So paint and Batman duct tape transformed this plain wood to the Batplane! (And made Mommy a superhero!)

So the challenge was on! What could I create?? Lately, I have been so inspired by the 4th of July projects on Pinterest. I saw one similar to my version on Pinterest but I can't find it now:( Sorry I like to give credit for the inspiration but it is lost in Pinterest land.

I knew I had all the supplies on hand already so I had to get started! 

Supplies: Wood scraps, spray paint, shell, screws, wire hanger and ribbon. 


I did add some Flag ribbons that I scored at Michael's for 75% off. I think this goes perfectly in our beach themed sunroom. What do you think? 


You simply can't go wrong with American decor. Hope you all enjoyed the holiday and weekend! 
~Jenn

Linked up to these Blog parties...


Thursday, July 4, 2013

Free To Be

Happy 4th of July!!

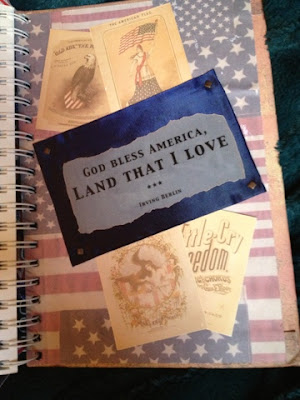
A few years ago I was involved in a circle journal and it is one of my treasured projects. 
If you are new to this idea, it's where you are in a group of others, each makes a journal and it goes around the list which also means it may go around the world, for people to add their entries to your book as you add to theirs. This one went out of the country a few times. 
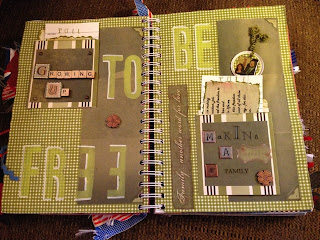
 I picked the theme Free to Be. 


In making the cover I printed a copy of the Declaration of Independence off the internet onto velum. I then soaked it in light coffee water, wrapped in around the inside and added my own touches.


This was my inside layout and others added to the following pages. It was interesting to see what others thought freedom meant.


Inside I printed the following journaling:


Freedom means so many things to each of us differently. Not having any immediate family that serves in the armed services does not exclude me from feeling indebted to those that have, are, and will serve to keep us in a country of freedom. 

Enjoy your 4th and your freedom.
~Cathy

button

Monday, July 1, 2013

Monster Truck Birthday Party Part 4 - DIY Monster Truck Race Track


For the whole Monster Truck experience, please review Parts 1-3 for ideas. This was my favorite part because it is an original idea. I was brainstorming with my scrap ladies one Friday night on what materials I could use to create the track but keep it safe for kids. I am a HUGE fan of the dollar stores and knew I wanted to use the pool noodles in some way. My girlfriend Laura came up with the brilliant idea to use yard sticks. Here is how we did it.

1. Use landscape chalk to mark out your track.
2. Measure your checkered flags and hammer in yardsticks with a rubber mallot. We hammered them in approximately 6 inches deep and just eyeballed the distance between the noodles.
3. Cut slits with a box cutter along the side of the noodle so you can slide it around the yardstick.
4. Attach your race flags from noodle to noodle and complete the track. I cut out the words Finish for the final flags at the end.

Another, prop that was a HUGE hit with the kids was the case (36) of Tire Swim tubes that I bought at the Dollar Tree. We blew them up and stacked them. The kids had a blast stacking and knocking them down. 


The greatest part was....the guests were able to take their Grave Digger trucks, tire tubes and noodles home after the party. Who needs 20 pool noodles and 36 tubes???

You don't even have to wait for a birthday. This is fun to do as a summer activity. 

Special thanks to my parents and brother who helped execute on the crazy Monster Truck track. You know you love me and my crazy ideas!!!!


Let's start planning next year.......
~Jenn

Linked up to these blog parties:

BWS tips buttonSumo's Sweet Stuff
Skip To My Lou